
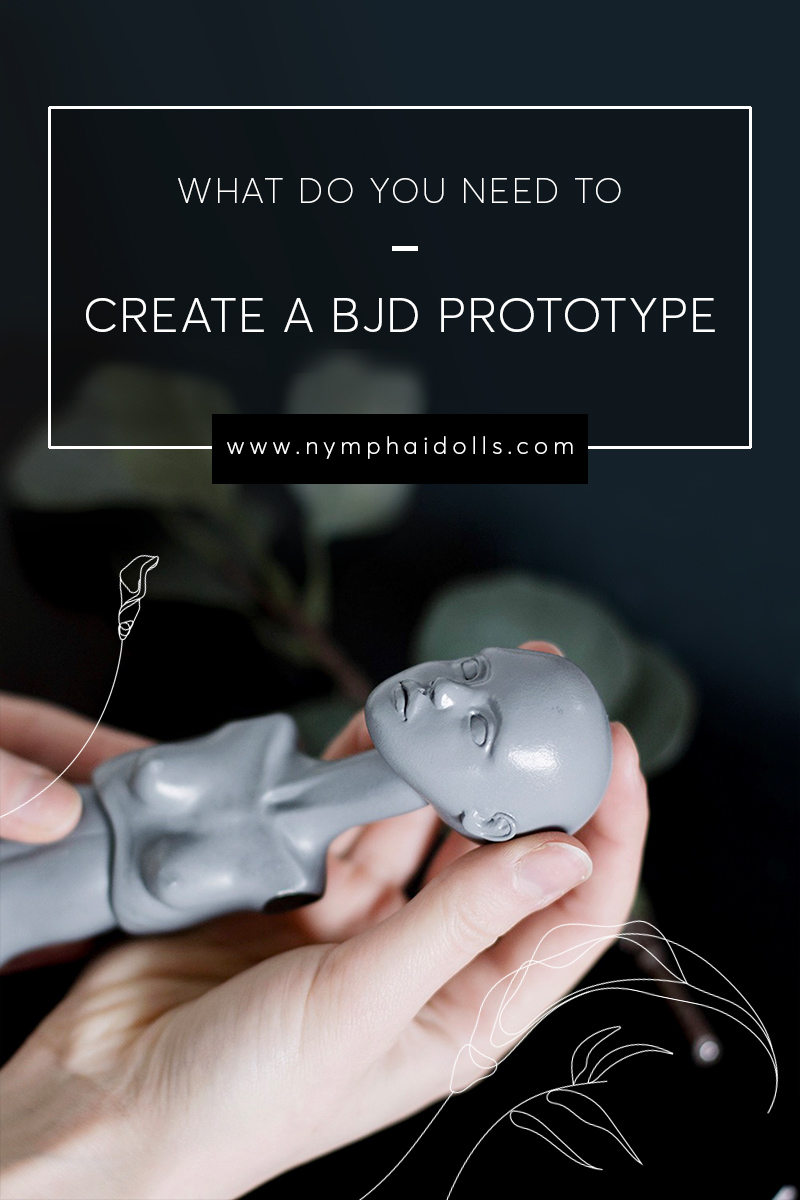
What do you need to create a BJD prototype?
Looking at those ball-jointed porcelain beauties, a lot of people ask themselves how one can create something like that? Fully posable and moving doll made completely by hand! Mind blowing isn't it? So lets rewind a little bit and take a look into the very first step of creating porcelain ball-jointed doll – the prototype and what do you need to make one!
This post contains affiliate links and I will be compensated if you make a purchase after clicking on my links. I wouldn’t promote anything I don’t absolutely love!
Materials
The list of materials is not very long. What you need the most is patience. And lots of it! Creating a BJD prototype from scratch is a very trying and exhausting process. If you're a beginner be prepared to design, sculpt and sand your prototype for a few months.
1. Clay
You need to decide which clay you'd want to use – air-dry or polymer clay? I myself am a fan of air-dry clay. Mostly because it's easy to sculpt, smooth out the surface and carve or sand imperfections. Polymer clay might be sturdier, but a pain to sand and change things in the process.

"La Doll" - this is the clay I use the most. It's very easy to work with and it smooths out evenly with a little bit of water. The clay is remarkably lightweight and suitable for delicate dolls. Most of my dolls are just a little taller than 30cm so being able to achieve a realistic look on a such small scale is very important to me. It sands to almost a shiny finish.
"Premier" - it's very similar to "La Doll" but a little bit more creamy and smooth. Also a little bit whiter if that's an important quality for you. I like to use "Premier" for doll faces or tiny details like fingers or toes. You can sculpt just using a damp brush instead of a metal tool. This lets you smoothen out hard to reach places, for example, nostrils or eye corners. It comes in slightly smaller packages than "La Doll" so have that in mind before buying!
"Creative Paperclay" - the first high-quality air-dry clay I've ever tried and loved since. The material is very good for sculpting dolls or any other projects, very lightweight and easy to work with. I would recommend it for sculpting bigger dolls since "Creative Paperclay" is not as delicate as "La Doll". There are more visible, harder to smoothen out fibres on a small scale.
2. Good quality sculpting tools

When sculpting a BJD you won't be able to do all the work with your fingers. There're so many crooks and indents in BJD design that the more precise approach is needed. For that reason I love to use metal wax carvers that look just like dentist tools. In the set like that you'll be able to find very fine needle-like tips, tiny spatulas, carving tools and more! I'm not using all of them all the time but it's good to have the selection for every type of work. Because of the high quality clay, I'm using tiny watercolour brushes as well. To smooth out hard to reach areas like nose, eyes or lips metal tools can be too harsh and your finger far too big. Try to sculpt with a brush, it's a game changer!
3. Sanding paper
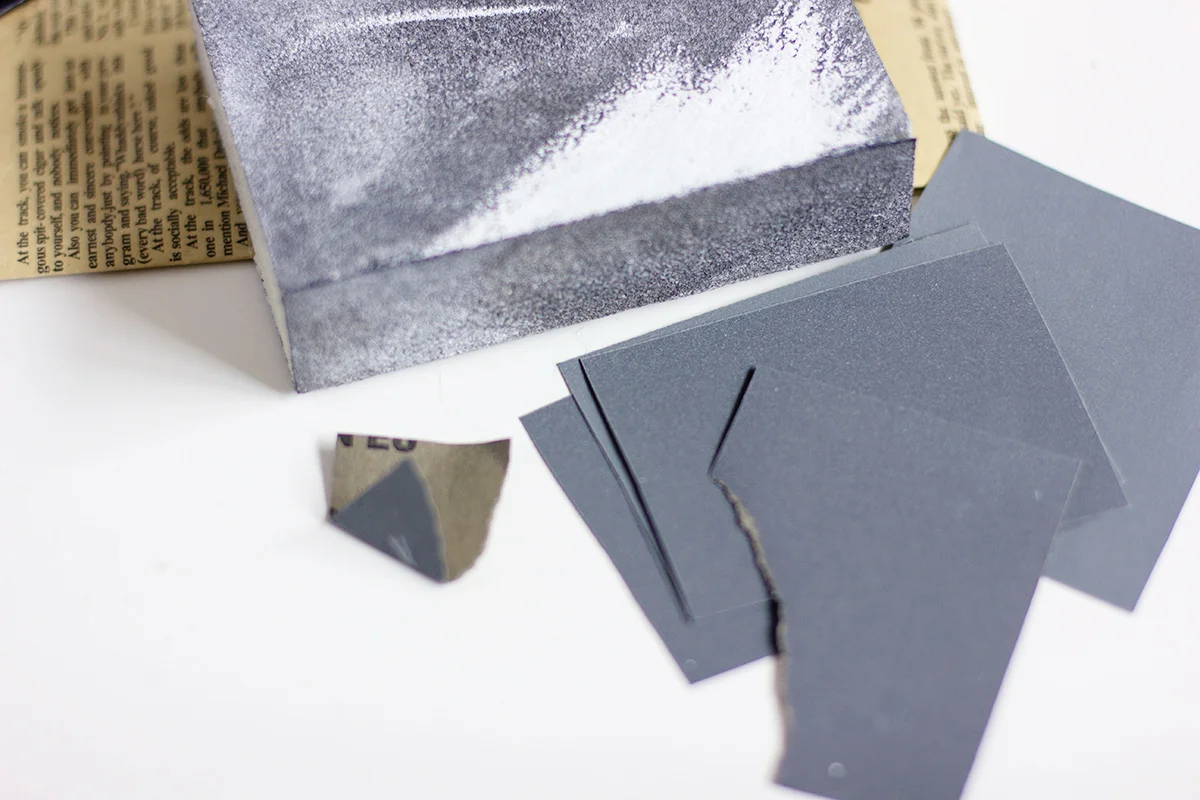
For the doll to move smoothly it literally has to be smooth! Make sure you're armed with medium, fine and very fine sand paper. Medium (or coarse if your doll is very rough) sand paper will remove the imperfections and fine sand paper will make it smooth. It's a long and very tedious process but it has to be done! Don't be surprised if it takes a few days, just sand through imperfections and don't forget to wear a mask. There will be quite a lot of nasty dust in the air.
4. Primer
When your doll is smooth and every joint fits in its socket perfectly it's time to prime. As I mentioned before, surface of the dried clay is quite soft, so to protect your doll spray it with primer. I love to use Mr. Surfacer 1000. It fills the tiny dents and seal the clay fibers that might be left after sanding. I coat my BJD prototype with several thin layers of primer and leave it to fully dry. After that you can start making plaster molds or paint it if it's your one-of-a-kind ball jointed doll!
Blueprint
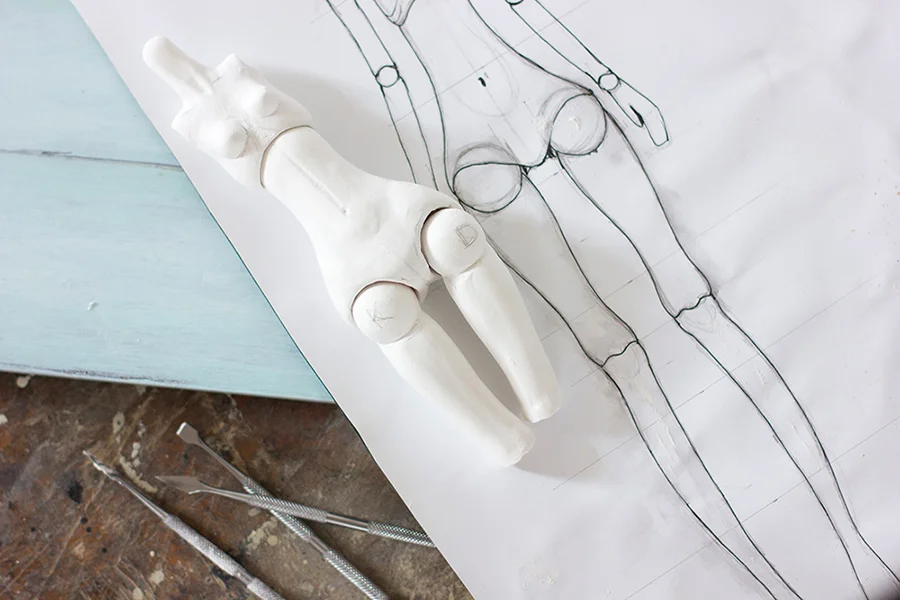
To make the whole sculpting process and technology behind it a little bit easier, create a good blueprint beforehand. Think about how tall your doll will be, what body proportions and joints it has. Everything should be noted in the blueprint. It has to be true to the size of your prototype. Following the blueprint you'll be able to check every part that you're sculpting and keep up with the proportions. If you're making the porcelain ball-jointed doll, don't forget to make your prototype bigger, because porcelain will shrink in the kiln.

Gear to create perfect joints
Creating the jointing system was very hard for me at first. I tried lots of ways to make them perfectly round. Today I'll talk about two main techniques that helped me in the process. If you have a Dremel tool, using already fully round wooden beads is a great option. I did that for hip and knee joints. You can chisel the gaps and cavities needed for the movements with the Dremel tool. Other option is to make all the joints from the same air-dry clay and shape them with plastic template for circles. Here's a blog post with a tutorial for that!
Don't miss other articles from me! Subscribe to the monthly letters and join the tribe. Here you'll find photos from behind the scenes, news about upcoming dolls and articles about porcelain ball-jointed dolls. Meet me there!