
BJD Sculpting Masterclass
Discover the art of creating expressive, fully poseable ball-jointed dolls from the first sketch to a beautifully sculpted art piece.
Without any special equipment - using air-dry clay!
-
-
Introduction
From the first ball of clay to the final joint, I've put together a detailed, step-by-step guide to help you understand the entire sculpting process and confidently create your own BJD, wherever you're starting from.
From the first ball of clay to the final joint, I've put together a detailed, step-by-step guide to help you understand the entire sculpting process and confidently create your own BJD, wherever you're starting from.
-
-
-
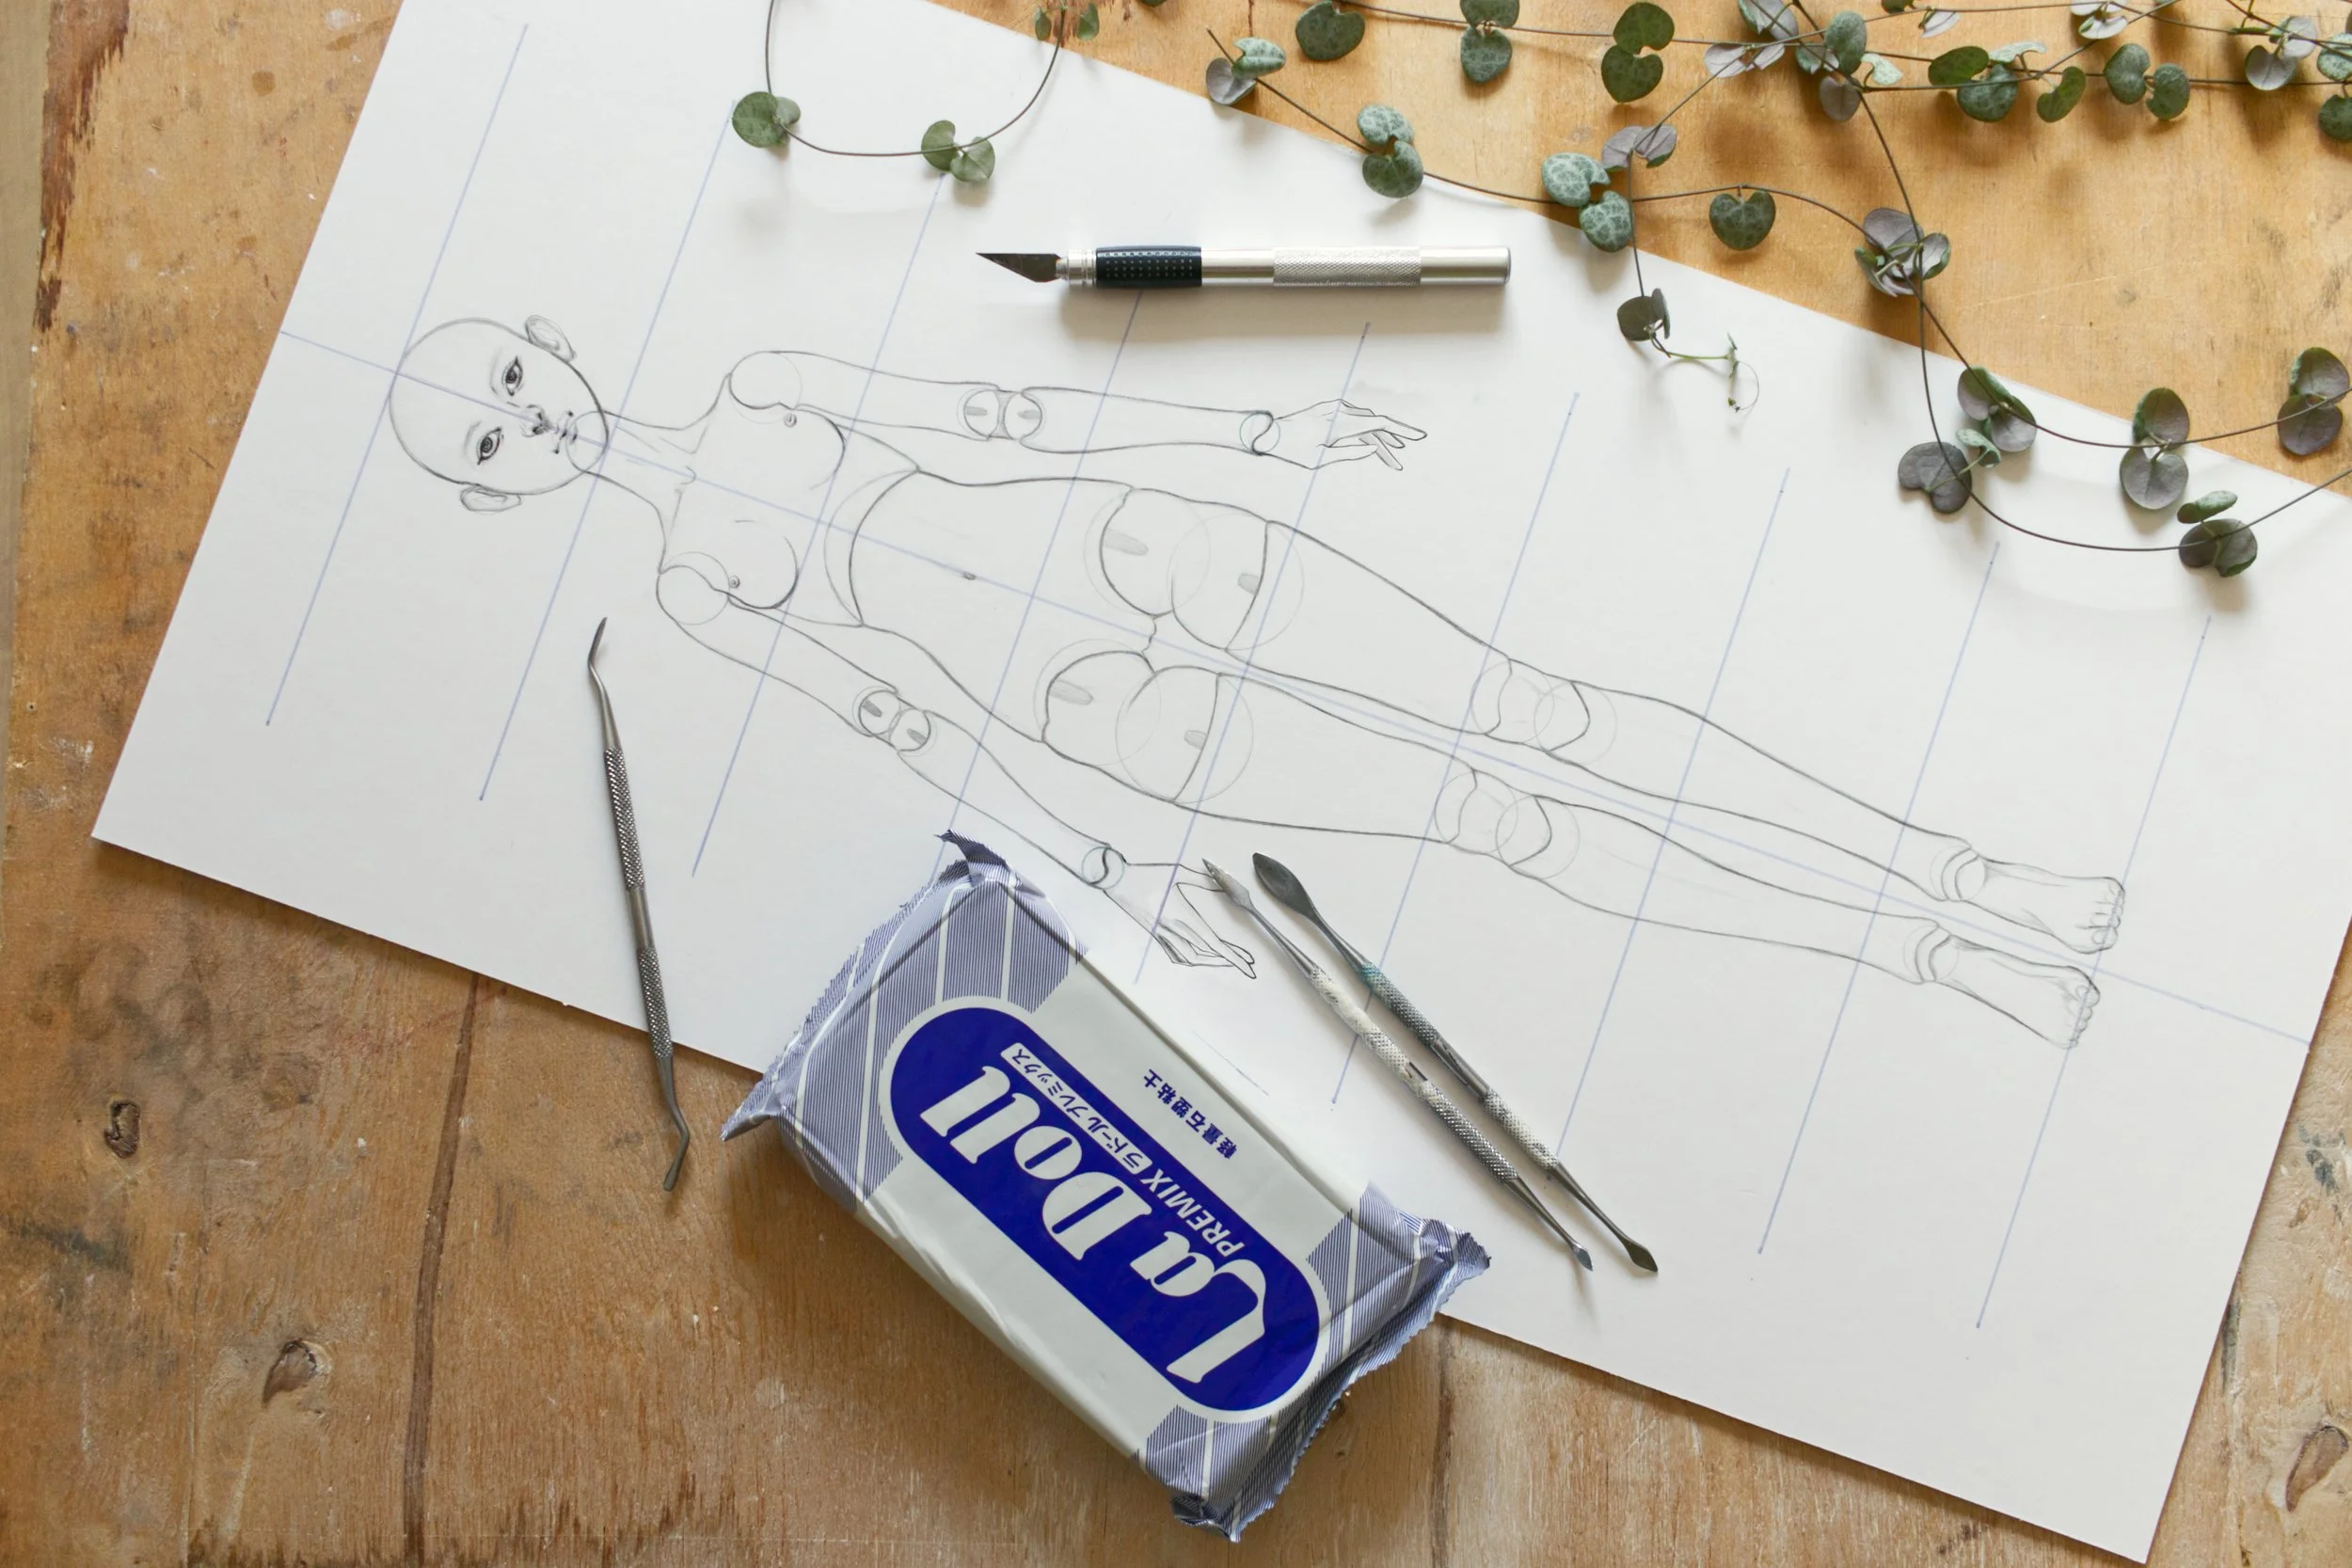
What you'll need?
When it comes to materials, three things really matter: good-quality clay, a few sculpting tools, an X-Acto knife, and a circle template for shaping joints. These are worth investing in - everything else is helpful, but not essential.
When it comes to materials, three things really matter: good-quality clay, a few sculpting tools, an X-Acto knife, and a circle template for shaping joints. These are worth investing in - everything else is helpful, but not essential.
-
-
-
Understanding proportions
Because BJDs are so technical - every joint has to align, every proportion has to work in three dimensions - you can't just wing it and sculpt freely the way you might with a simple art doll.
Because BJDs are so technical - every joint has to align, every proportion has to work in three dimensions - you can't just wing it and sculpt freely the way you might with a simple art doll.
-
Creating a blueprint
It's not about making something pretty - it's a working technical document. It's the map you'll refer back to constantly while sculpting, and it will save you from a lot of costly mistakes down the line.
It's not about making something pretty - it's a working technical document. It's the map you'll refer back to constantly while sculpting, and it will save you from a lot of costly mistakes down the line.
-
Useful resources
If you ever want to dig deeper into air-dry clays, sculpting techniques, or troubleshooting specific issues, these articles are a great supplement.
If you ever want to dig deeper into air-dry clays, sculpting techniques, or troubleshooting specific issues, these articles are a great supplement.
-
-
-
How to make BJD hollow?
This is probably the most-asked question among BJD beginners, and it's a great one to ask early. The moment you start sculpting, you run into this exact problem: how do you keep all the BJD parts hollow?
This is probably the most-asked question among BJD beginners, and it's a great one to ask early. The moment you start sculpting, you run into this exact problem: how do you keep all the BJD parts hollow?
-
Shaping the styrofoam
I like to use dry floral foam because it's easy to shape and carve, and its light, crumbly texture makes it simple to remove later on. If you'd rather not use foam, aluminum foil or crumpled paper both work as substitutes.
I like to use dry floral foam because it's easy to shape and carve, and its light, crumbly texture makes it simple to remove later on. If you'd rather not use foam, aluminum foil or crumpled paper both work as substitutes.
-
Styrofoam alternatives
If you'd rather not use foam, a great alternative is simple paper or aluminum foil. For the legs specifically, I use paper wrapped in plastic tape, which makes removal much easier later on.
If you'd rather not use foam, a great alternative is simple paper or aluminum foil. For the legs specifically, I use paper wrapped in plastic tape, which makes removal much easier later on.
-
Using straws
Using straws to keep pieces hollow is a popular technique among BJD artists. You can use paper straws instead of plastic; just be mindful of how much water you use while sculpting with clay - too much moisture will cause paper straws to soften or dissolve.
Using straws to keep pieces hollow is a popular technique among BJD artists. You can use paper straws instead of plastic; just be mindful of how much water you use while sculpting with clay - too much moisture will cause paper straws to soften or dissolve.
-
First layer of clay
Keep this first layer thin; it helps avoid cracking and ensures the clay dries faster and more evenly.
Keep this first layer thin; it helps avoid cracking and ensures the clay dries faster and more evenly.
-
Making the parts hollow
Once your roughly sculpted pieces are completely dry, it's time to remove the styrofoam or paper core and hollow the pieces out.
Once your roughly sculpted pieces are completely dry, it's time to remove the styrofoam or paper core and hollow the pieces out.
-
Fixing the seams
To make sure these pieces stay firmly joined - and to smooth over those seams - we need to reinforce them with a bit of clay before moving on.
To make sure these pieces stay firmly joined - and to smooth over those seams - we need to reinforce them with a bit of clay before moving on.
-
-
-
Making the balls for joints
I strongly recommend sculpting your own joint balls from clay rather than using pre-made ones. Making them yourself gives you full control over shaping, drilling, and cutting the slits for elastic later on.
I strongly recommend sculpting your own joint balls from clay rather than using pre-made ones. Making them yourself gives you full control over shaping, drilling, and cutting the slits for elastic later on.
-
-
-
Preparing to sculpt the features
Starting with a smooth, symmetrical base makes it much easier to maintain symmetry throughout the rest of the sculpting process, especially once you get into the eyes and nose.
Starting with a smooth, symmetrical base makes it much easier to maintain symmetry throughout the rest of the sculpting process, especially once you get into the eyes and nose.
-
Sculpting the eyes
Sculpting is a fluid process, so don't hesitate to make adjustments as you go - you may notice small imperfections around the eyes even while working on the lips later, and that's completely normal.
Sculpting is a fluid process, so don't hesitate to make adjustments as you go - you may notice small imperfections around the eyes even while working on the lips later, and that's completely normal.
-
Sculpting the nose
Feel free to play with these proportions to suit your doll's character; a slightly narrower or wider nose can dramatically change the overall expression.
Feel free to play with these proportions to suit your doll's character; a slightly narrower or wider nose can dramatically change the overall expression.
-
Sculpting the lips
As with all the facial features, I like to draw the lips first to work out their placement and proportions before touching any clay.
As with all the facial features, I like to draw the lips first to work out their placement and proportions before touching any clay.
-
Sculpting the ears
There are a few simple tricks to help you place the ears correctly. Symmetry matters very much here, since any inaccuracies become obvious from a front-facing view.
There are a few simple tricks to help you place the ears correctly. Symmetry matters very much here, since any inaccuracies become obvious from a front-facing view.
-
Finishing touches
Patience comes into play here once again. Sanding a full doll can easily take a few hours, so prepare yourself for a long, methodical process rather than expecting to rush through it.
Patience comes into play here once again. Sanding a full doll can easily take a few hours, so prepare yourself for a long, methodical process rather than expecting to rush through it.
-
-
-
Sculpting the basic shape
From here, continue adding clay in layers until the shape starts to resemble your blueprint. At this stage, don't worry about sanding yet - just focus on building up the clay and letting it dry between layers.
From here, continue adding clay in layers until the shape starts to resemble your blueprint. At this stage, don't worry about sanding yet - just focus on building up the clay and letting it dry between layers.
-
Detailing the lower torso
A smooth, even surface makes all your subsequent detailing show up much more clearly. I start this process by drawing the centerline, the curves of the belly, and marking where the belly button will sit.
A smooth, even surface makes all your subsequent detailing show up much more clearly. I start this process by drawing the centerline, the curves of the belly, and marking where the belly button will sit.
-
Making hip joints
In this lesson, I'll walk you through making a double hip joint - it's more complex to build, but it offers a much wider range of motion.
In this lesson, I'll walk you through making a double hip joint - it's more complex to build, but it offers a much wider range of motion.
-
-
-
Sculpting the basic shape
It's good practice to work on the upper and lower torso simultaneously, so both pieces stay at a similar stage of progress, which makes it much easier to get them to fit together seamlessly in the end.
It's good practice to work on the upper and lower torso simultaneously, so both pieces stay at a similar stage of progress, which makes it much easier to get them to fit together seamlessly in the end.
-
Detailing the upper torso
When detailing the torso, I always start by lightly sketching everything directly onto the clay, beginning with the centerline to help keep both sides symmetrical as I go.
When detailing the torso, I always start by lightly sketching everything directly onto the clay, beginning with the centerline to help keep both sides symmetrical as I go.
-
-
-
Sculpting the legs
I sculpt the legs as one continuous unit and cut them apart into pieces only once I'm happy with the overall shape - this makes it much easier to keep both legs symmetrical.
I sculpt the legs as one continuous unit and cut them apart into pieces only once I'm happy with the overall shape - this makes it much easier to keep both legs symmetrical.
-
Making the knee joints - METHOD 1
The first method preserves more of the leg's original sculpted form, while the second allows for more detailed sculpting of the kneecap itself.
The first method preserves more of the leg's original sculpted form, while the second allows for more detailed sculpting of the kneecap itself.
-
Making the knee joints - METHOD 2
This approach is a bit more challenging, but it gives you significantly more room to experiment with the final shape.
This approach is a bit more challenging, but it gives you significantly more room to experiment with the final shape.
-
Sculpting feet
In this lesson, I'll be sculpting a raised (arched) foot pose, though most of the techniques covered here apply just as well to a flat-footed pose.
In this lesson, I'll be sculpting a raised (arched) foot pose, though most of the techniques covered here apply just as well to a flat-footed pose.
-
-
-
Sculpting upper arms
Personally, sculpting arms (hands aside) is one of the easiest parts of the whole doll for me. I don't aim for heavy detail here - just enough to suggest the general muscular structure of a human arm without overworking it.
Personally, sculpting arms (hands aside) is one of the easiest parts of the whole doll for me. I don't aim for heavy detail here - just enough to suggest the general muscular structure of a human arm without overworking it.
-
Sculpting forearms
Even though the forearm actually contains quite a lot of individual muscles, I prefer to simplify the overall shape and put more detailing focus into the hands and joints instead.
Even though the forearm actually contains quite a lot of individual muscles, I prefer to simplify the overall shape and put more detailing focus into the hands and joints instead.
-
Making elbow joints
For the elbow joints, I use a similar approach to Method 2 from the knee joint lessons. Start by taking two joint balls and gluing them together with PVA glue plus a small amount of clay in between.
For the elbow joints, I use a similar approach to Method 2 from the knee joint lessons. Start by taking two joint balls and gluing them together with PVA glue plus a small amount of clay in between.
-
Sculpting hands
The first step is getting a clear idea of the hand you're going to sculpt - don't jump in blindly. Decide on the pose you want to achieve, and keep a reference nearby the entire time you're sculpting.
The first step is getting a clear idea of the hand you're going to sculpt - don't jump in blindly. Decide on the pose you want to achieve, and keep a reference nearby the entire time you're sculpting.
-
-
-
Cutting slits and drilling
The final step before stringing the doll is drilling all the joints and carving slits for the elastic to move through freely.
The final step before stringing the doll is drilling all the joints and carving slits for the elastic to move through freely.
-
Test stringing
Test-stringing is one of the most useful steps in making a ball-jointed doll, and one of the easiest to skip. Once the pieces are sculpted, it's tempting to rush toward finishing, but a doll that looks perfect on the table can still fail the moment you try to pose it.
Test-stringing is one of the most useful steps in making a ball-jointed doll, and one of the easiest to skip. Once the pieces are sculpted, it's tempting to rush toward finishing, but a doll that looks perfect on the table can still fail the moment you try to pose it.
-
Stringing
Stringing can look intimidating at first, but I'll share as many helpful references and tutorials as I can along the way to make it more approachable.
Stringing can look intimidating at first, but I'll share as many helpful references and tutorials as I can along the way to make it more approachable.
-
-
-
Clay cracking
Cracking is one of the most common frustrations with air-dry clay. In my experience, some cheaper air-dry clays are more prone to it than La Doll, but that's just my personal experience, so take it with a grain of salt.
Cracking is one of the most common frustrations with air-dry clay. In my experience, some cheaper air-dry clays are more prone to it than La Doll, but that's just my personal experience, so take it with a grain of salt.
-
How to make air-dry clay stronger (and less fragile)
I've been using air-dry clay for more than ten years now, and along the way I've picked up a few techniques that make it much more durable.
I've been using air-dry clay for more than ten years now, and along the way I've picked up a few techniques that make it much more durable.
-
How to achieve a very smooth finish with air-dry clay
Smooth air-dry clay comes down to patience: sand from coarse to super-fine sandpaper, seal the fibres with water, and finish with primer. It takes time, but the difference is huge.
Smooth air-dry clay comes down to patience: sand from coarse to super-fine sandpaper, seal the fibres with water, and finish with primer. It takes time, but the difference is huge.
-
-
What You'll LearnDesign your doll’s proportions and features. You’ll learn how to build your own reference blueprint or use the downloadable one I provide to guide your sculpt from start to finish.
Create Your Blueprint
Design and Sculpt Joints
Joints can be tricky, but I’ll show you how to design elegant, functional ball joints that give your doll natural, graceful movements.

Adele, Instructor
Understand simplified facial anatomy for doll artists. Learn to sculpt features that capture personality, emotion, and the unique character of your doll.
Sculpt Expressive Faces
Build a Fully Poseable BJD
From torso to limbs, I’ll demonstrate every step with photos, videos, and anatomy breakdowns, so you can create a complete, poseable ball-jointed doll from air-dry clay.